Local AI with Docker, n8n, Qdrant, and Ollama
Link: https://www.datacamp.com/tutorial/local-ai
Companies worldwide are increasingly concerned about protecting sensitive information while harnessing the power of AI. This guide presents a comprehensive solution for building secure, local AI applications using a powerful combination of open-source tools.
We will use the Self-hosted AI Starter Kit to quickly set up a local AI environment. This kit will automatically run Ollama, Qdrant, n8n, and Postgres. Additionally, we will learn how to build an AI workflow for a RAG (Retrieval-augmented generation) chatbot using the Harry Potter dataset through the n8n dashboard.
Whether you are a developer, data scientist, or non-technical professional looking to implement secure AI solutions, this tutorial will provide you with the foundation to create powerful, self-hosted AI workflows while maintaining complete control over your sensitive data.
What is Local AI?
Local AI allows you to run artificial intelligence systems and workflows on your own infrastructure rather than cloud services, providing enhanced privacy and cost efficiency.
If you are new to the AI ecosystem, you should first check out our skill track on AI Fundamentals to get up to speed. By completing this series of courses, you will gain actionable knowledge on popular AI topics such as ChatGPT, large language models, generative AI, and more.
Here is the list of tools that we will use to build and run our local AI applications:
- Docker: This is your containerization platform that packages all AI components into manageable, isolated environments. It will help us run all the AI tools with a single command.
- n8n: A workflow automation framework that allows you to build AI workflows using a drag-and-drop interface. It requires no coding knowledge, making it ideal for non-technical individuals.
- Postgres: This tool stores all data and logs, acting as a memory buffer for the n8n framework.
- Qdrant: A vector database and search engine that makes AI-generated content searchable and manageable.
- Ollama: An AI model manager that enables you to run any open-source large language model locally with minimal hardware requirements.
The n8n is our primary framework for building the AI workflow for the RAG Chatbot. We will use Qdrant as the vector store and Ollama as the AI model provider. Together, these components will help us create the RAG system.
Installing Docker
We will download and install the Docker desktop application by going to the official Docker website. It is quite easy to install and get started.
Learn more about Docker by following the Docker for Data Science tutorial or take our Introduction to Docker course.
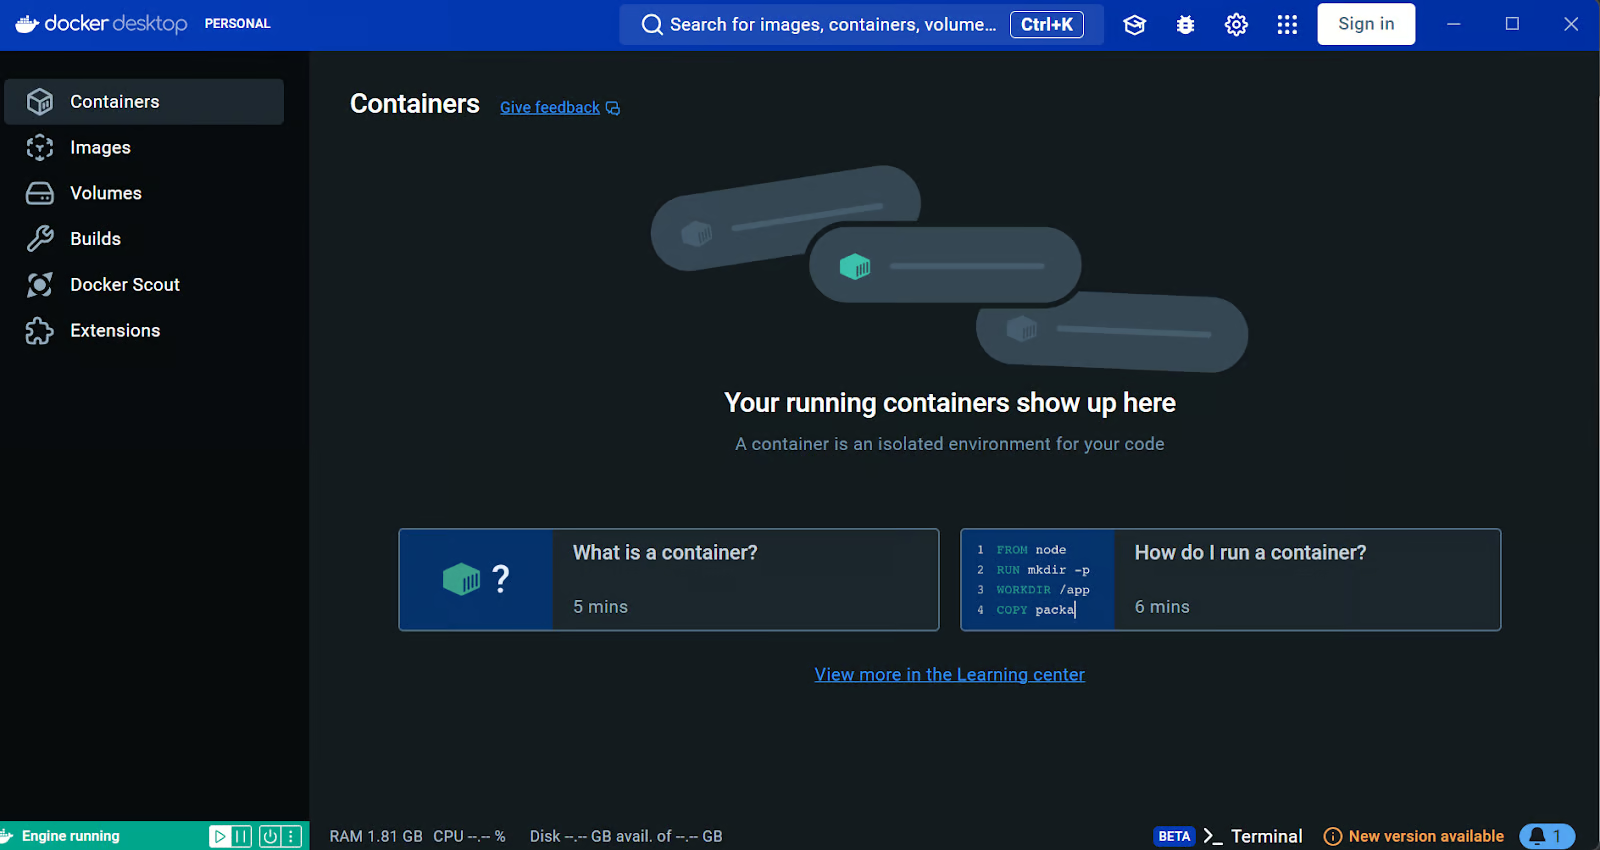
Source: Docker: Accelerated Container Application Development
Windows users need an additional tool to successfully run Docker containers: the Windows Subsystem for Linux (WSL). This allows developers to install a Linux distribution and use Linux applications directly on Windows.
To install WSL on Windows, type the following command in the terminal or PowerShell. Make sure to launch PowerShell as an administrator.
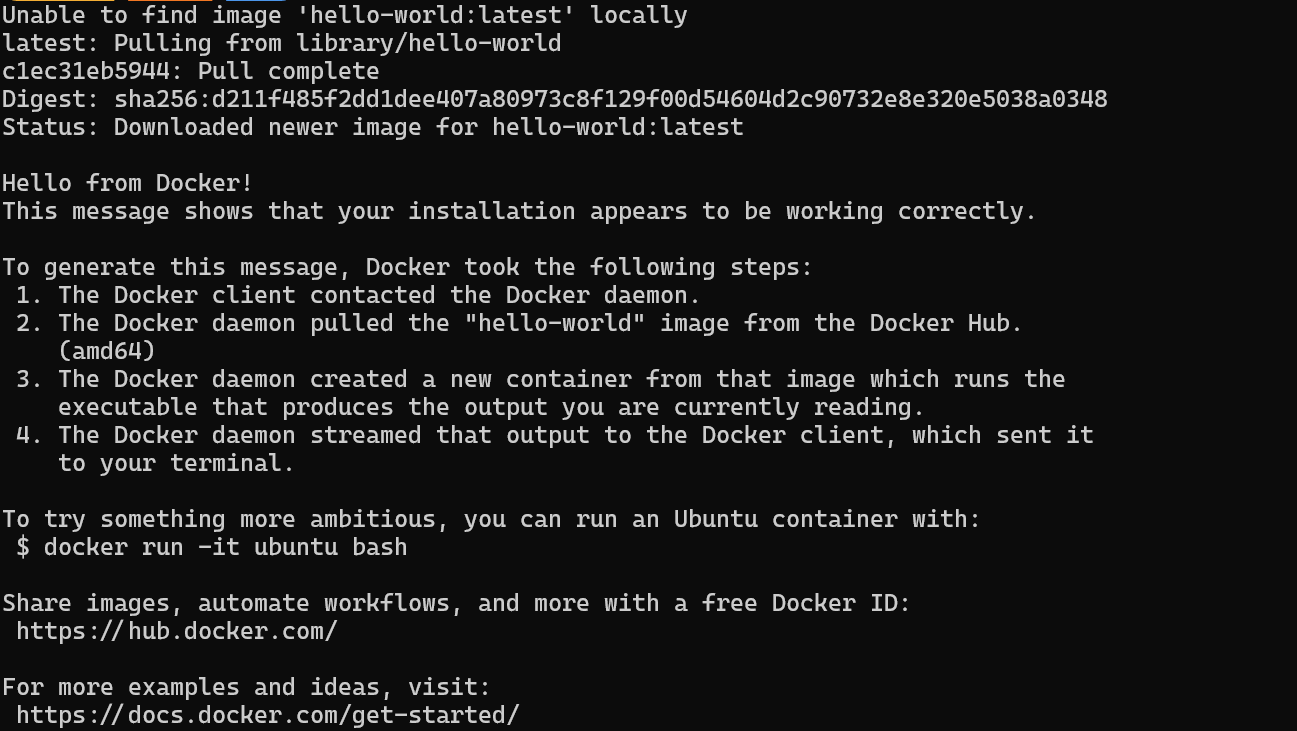
$ wsl --installAfter successfully installing WSL, restart your system. Then, type the following command in PowerShell to check if Docker is working properly.
$ docker run hello-worldDocker successfully pulled the hello-world image and started the container.
Installing and Running Local AI Applications with Docker Compose
In this guide, we will learn how to use Docker Compose to set up AI services locally. This approach allows you to load Docker images and deploy containers within minutes, providing a simple way to run and manage multiple AI services on your infrastructure.
First, we will clone n8n-io/self-hosted-ai-starter-kit by typing the following command in the terminal.
$ git clone https://github.com/n8n-io/self-hosted-ai-starter-kit.git
$ cd self-hosted-ai-starter-kit
This code snippet consists of two Bash commands:
-
git clone https://github.com/n8n-io/self-hosted-ai-starter-kit.git: This command uses Git to create a local copy (clone) of the repository located at the specified URL. The repository contains the "self-hosted-ai-starter-kit" project files. -
cd self-hosted-ai-starter-kit: This command changes the current directory to the newly cloned "self-hosted-ai-starter-kit" directory, allowing you to work with the project files.
Overall, these commands aim to download a project from GitHub and navigate into its directory to start working on it.
The starter kit is the easiest way to set up the servers and applications needed to build an AI workflow. Then, we will load the Docker images and run the containers.
$ docker compose --profile cpu upThe code snippet is a command to start Docker containers using Docker Compose. Here's a breakdown:
docker compose: This is the command to use Docker Compose, a tool for defining and running multi-container Docker applications.--profile cpu: This option specifies a profile named "cpu." Profiles allow you to selectively enable services defined in yourdocker-compose.ymlfile. Only the services associated with the "cpu" profile will be started.up: This command starts the containers defined in yourdocker-compose.ymlfile. It creates and starts the containers in the foreground, showing their logs in your terminal.
Overall, this command starts the Docker containers associated with the "cpu" profile, allowing you to run a specific subset of your application.
If you have an NVIDIA GPU, try typing the command below to access the acceleration in response generation. Also, set up the NVIDIA GPU for Docker by following the Ollama Docker guide.
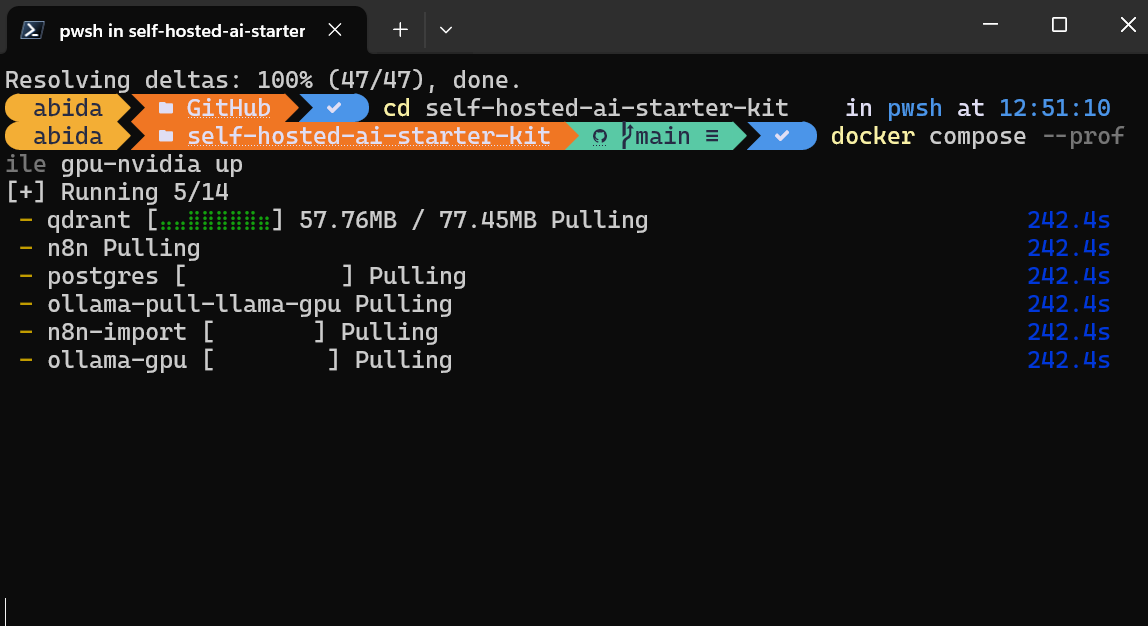
$ docker compose --profile gpu-nvidia upThe code snippet is a command to start Docker containers using Docker Compose with a specific profile. Here's a breakdown:
docker compose: This is the command to use Docker Compose, a tool for defining and running multi-container Docker applications.--profile gpu-nvidia: This flag specifies a profile namedgpu-nvidia. Profiles allow you to define different sets of services or configurations in yourdocker-compose.ymlfile. Thegpu-nvidiaprofile likely includes services or configurations optimized for NVIDIA GPU usage.up: This command starts the services defined in thedocker-compose.ymlfile. It builds, (re)creates, starts, and attaches to containers for a service.
Overall, this command aims to start up the Docker containers associated with the gpu-nvidia profile, which might be configured to leverage NVIDIA GPUs for tasks like machine learning or other GPU-intensive applications.
It will take a few minutes as it downloads all the Docker images and then runs the Docker containers one by one.
All the Docker services are running. The exited Docker containers were used to download the Llama 3.2 model and import the n8n backup workflow.
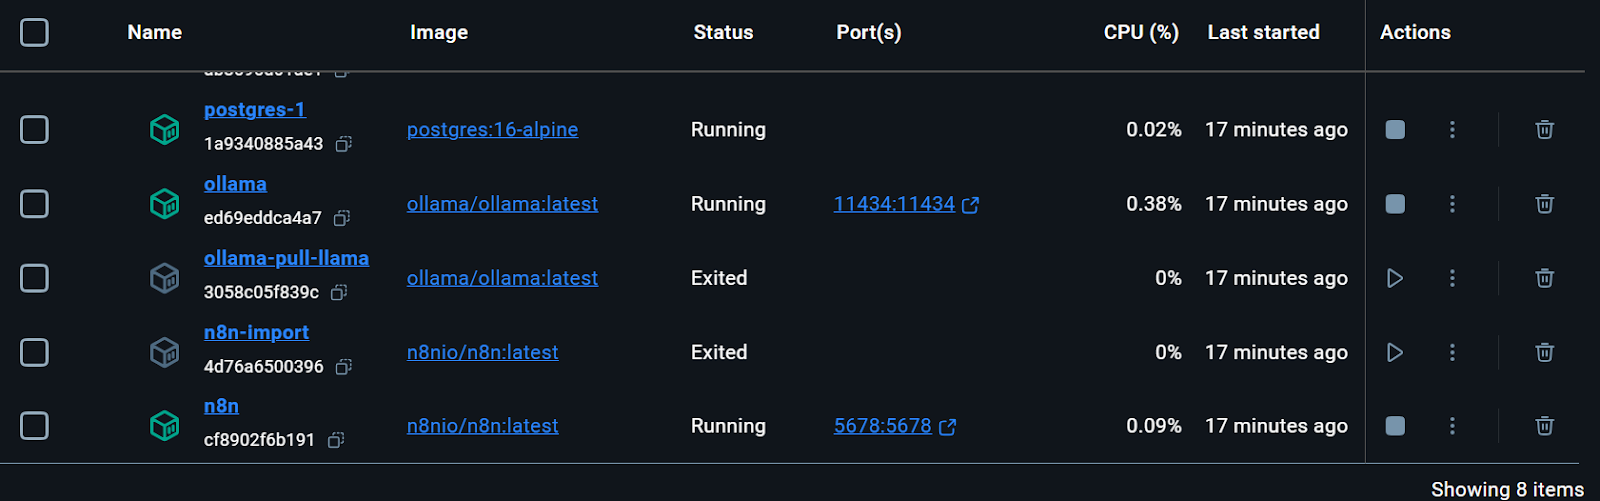
We can even check the status of running the docker container by typing the following command in the terminal.
$ docker compose psThe command docker compose ps is used to list the status of containers defined in a Docker Compose setup. When you run this command, it shows you a table of all the containers in your current Docker Compose project, including their names, states (e.g., running, exited), and other relevant details like ports. This is useful for quickly checking which containers are up and running and their current status.
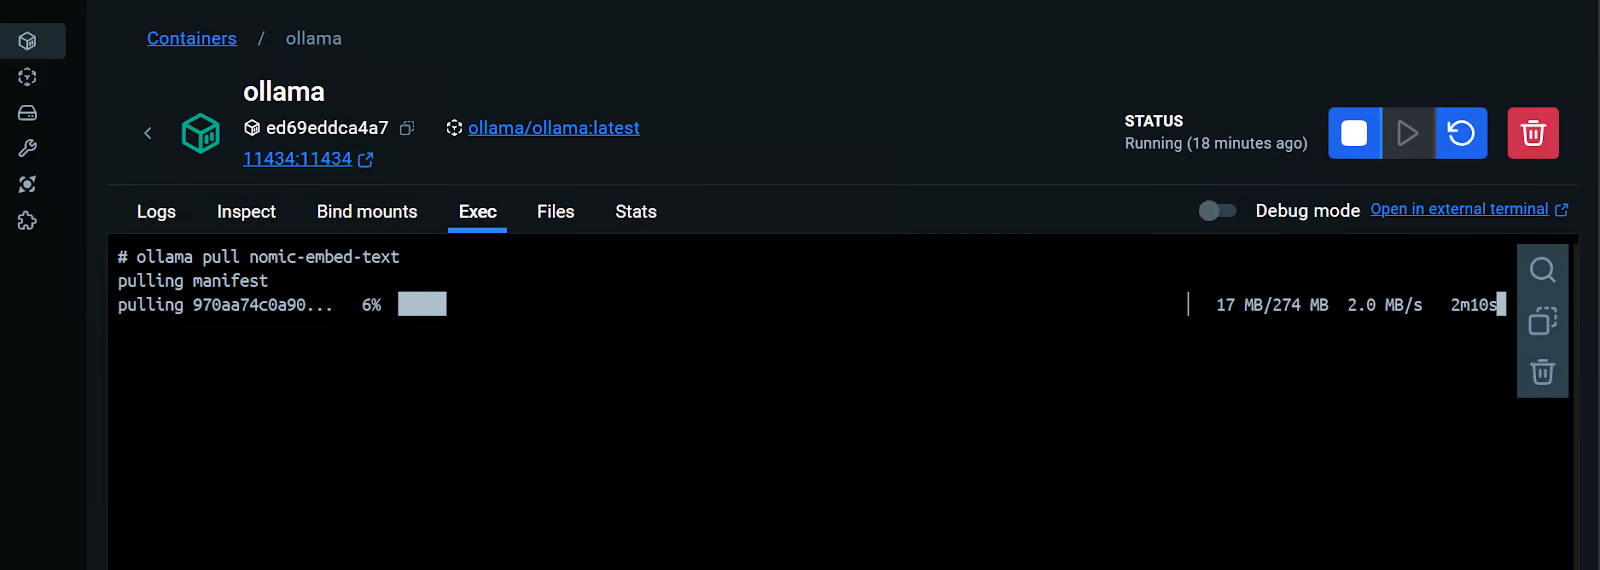
The starter kit included the script for downloading the Llama 3.2 model. However, for a proper RAG Chatbot application, we also need the embedding model. We will go to the Ollama Docker container, click on the “Exec” tab, and type the following command to download the “nomic-embed-text” model.
$ ollama pull nomic-embed-textThe code snippet is a Bash command that uses the ollama tool to pull a specific resource called nomic-embed-text.
ollama: This is likely a command-line tool or utility that manages or interacts with resources or models.pull: This subcommand is used to download or retrieve the specified resource.nomic-embed-text: This is the name of the resource or model being pulled.
The command aims to download or update the nomic-embed-text resource to your local environment using the ollama tool.
As we can see, we can interact with a Docker container as if it were a separate virtual machine.
Open the n8n dashboard URL http://localhost:5678/ in your browser to set up an n8n user account with email and password. Then, click the home button on the main dashboard page and access the Demo workflow.
The demo is a simple LLM workflow that takes the user input and generates the response.
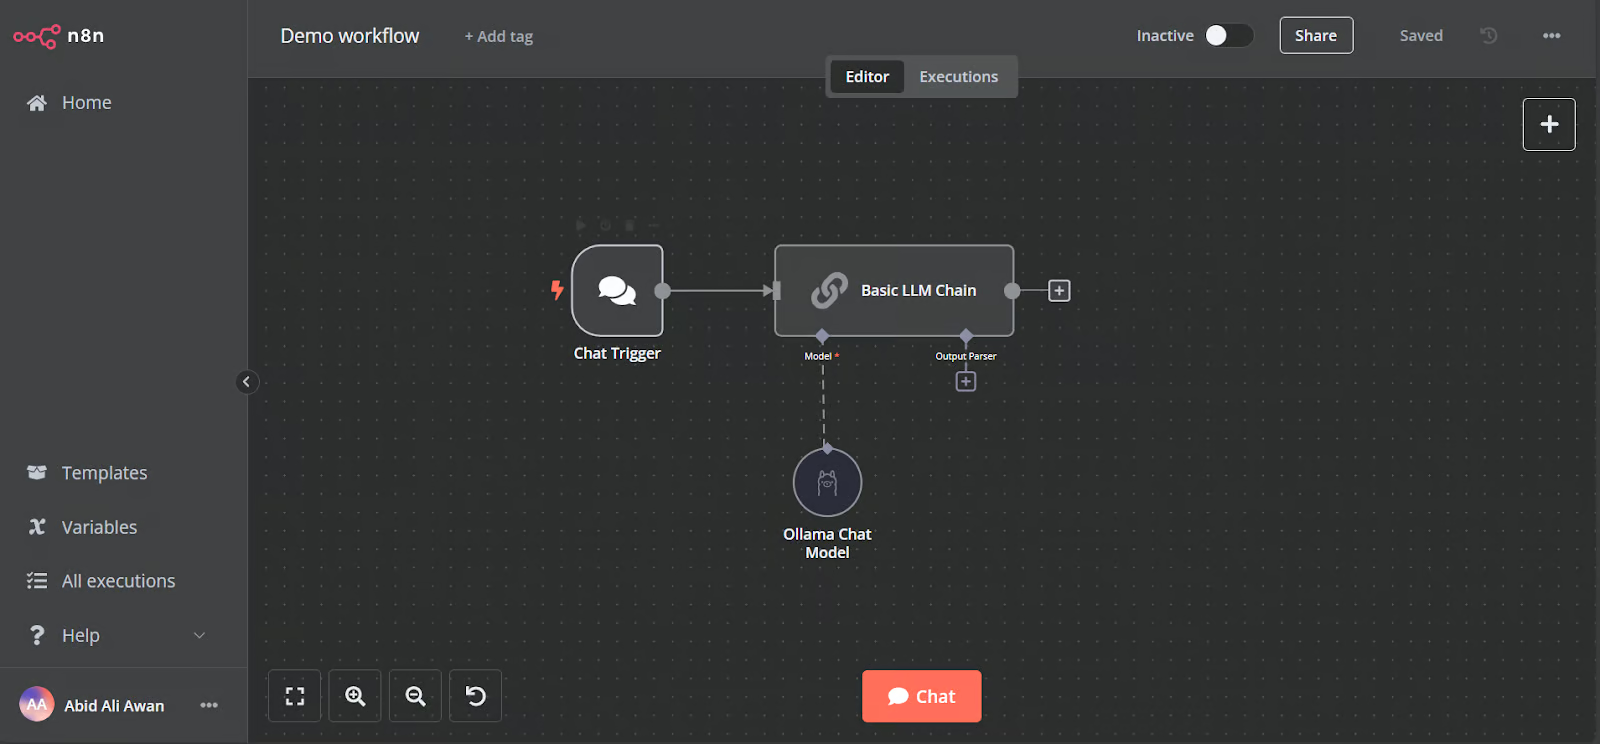
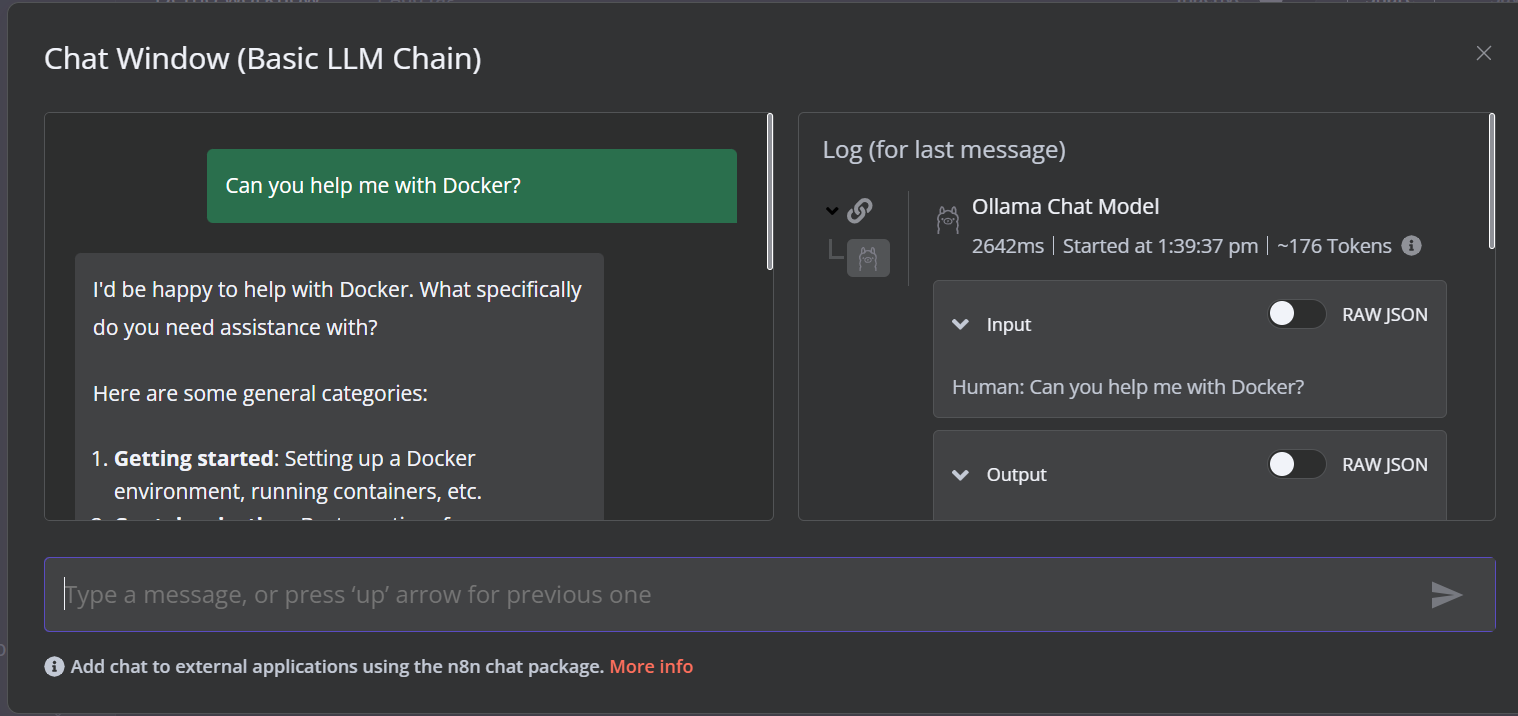
To run the workflow, click on the Chat button and start typing your question. Within a few seconds, a response will be generated.
Please note that we are using a small language model with GPU acceleration, so the response typically takes only about 2 seconds.
Create the AI Workflow with a n8n Dashboard
In this project, we will build a RAG (Retrieval-Augmented Generation) chatbot that uses data from the Harry Potter movies to provide context-aware and accurate responses. This project is a no-code solution, meaning all you need to do is search for the necessary workflow components and connect them to create an AI workflow.
n8n is a no-code platform similar to Langchain. Follow the RAG with Llama 3.1 8B, Ollama, and Langchain tutorial to get an overview of how to create a similar AI workflow using Langchain.
1. Adding the chat trigger
Click on the “Add the first step” button in the middle of the dashboard, search for the “Chat Trigger,” and add it.
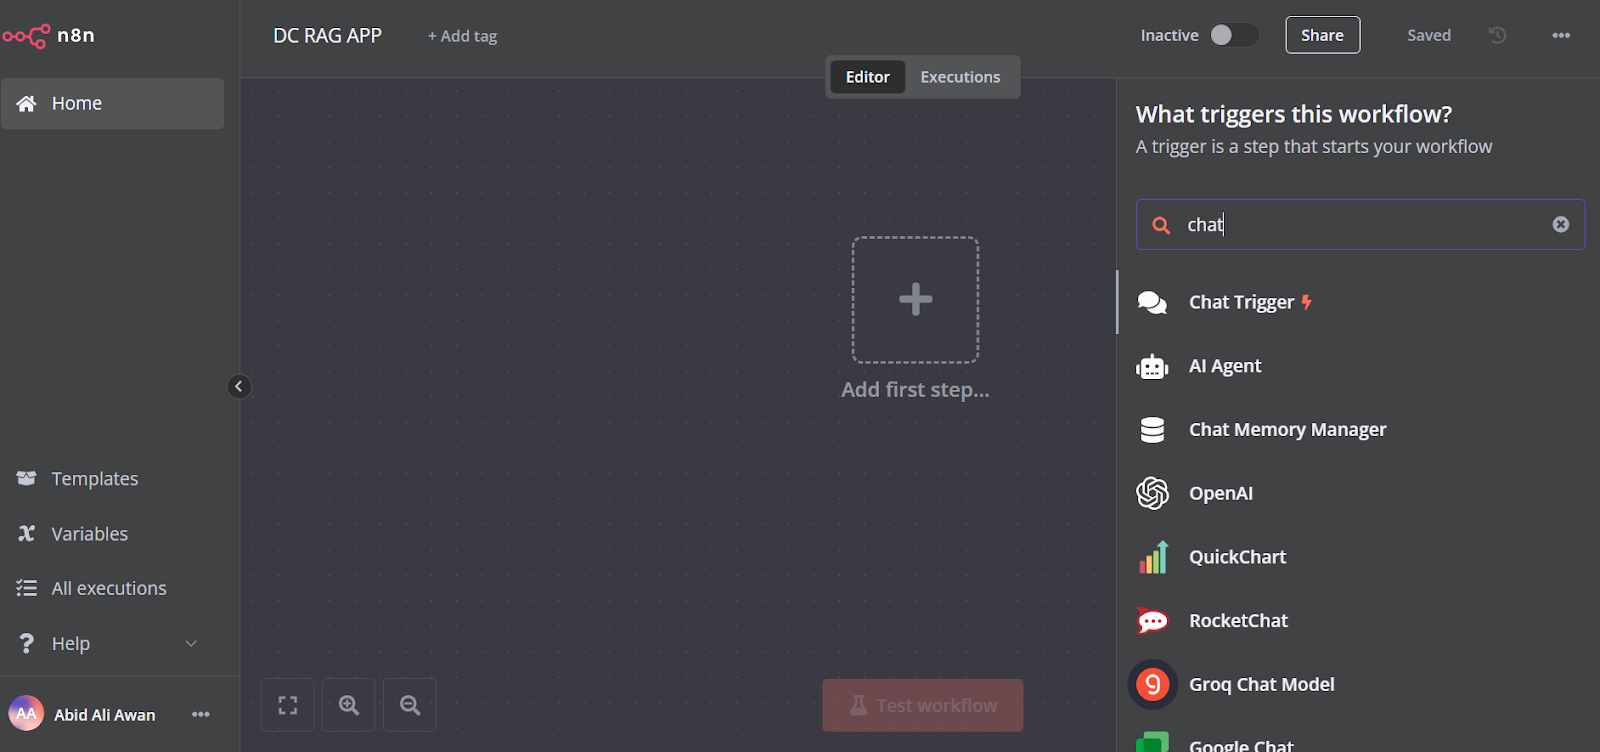
Make sure you have enabled “Allow File Uploads”.

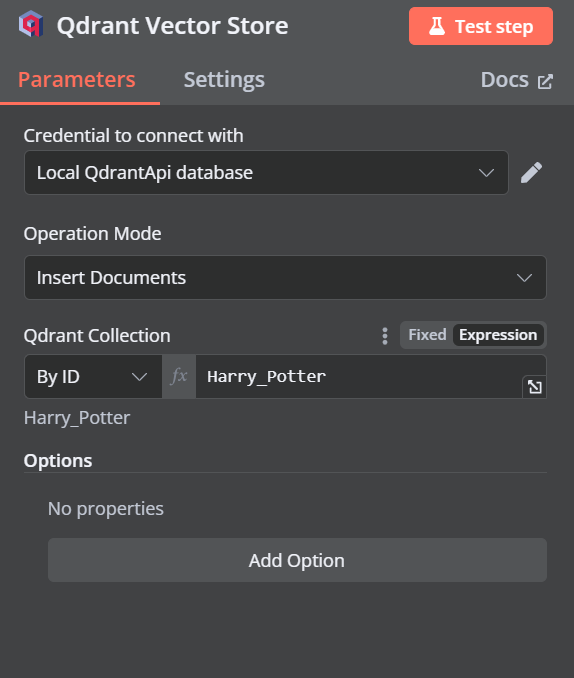
2. Adding the Qdrant vector store
You can add another component called “Qdrant Vector Store” by clicking on the plus (+) button on the “Chat Trigger” component and searching for it.
Change the operation mode to “Insert Documents,” change the Qdrant collection to “By ID,” and type the ID as “Harry_Potter.”
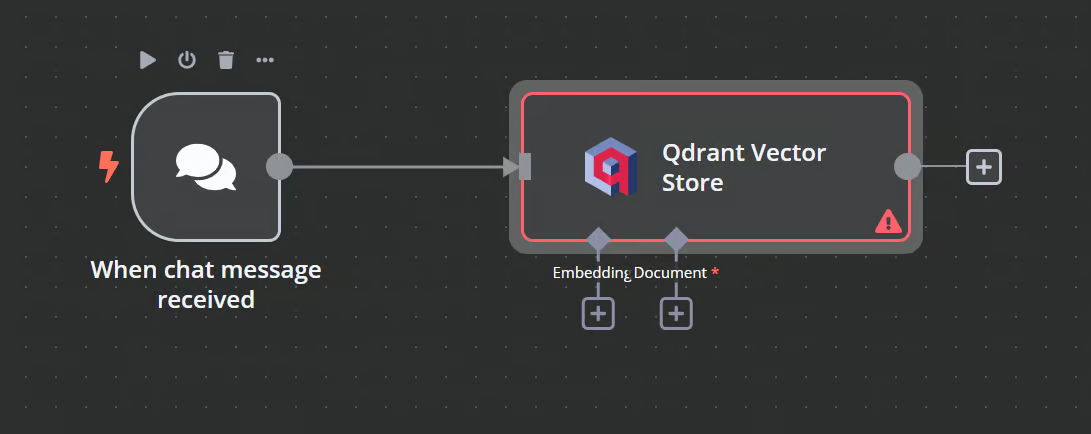
When we exit the option, we will see that the chat trigger is connected with our vector store.
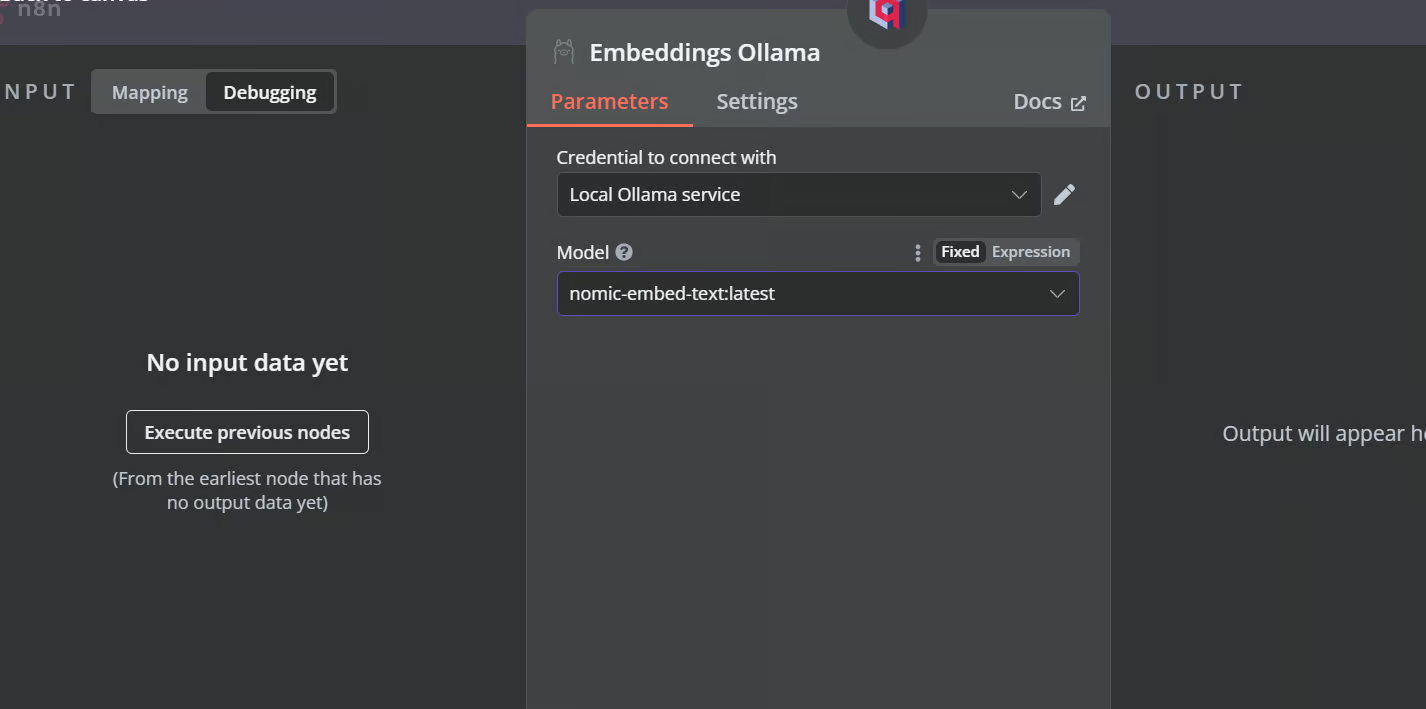
3. Connecting the embedding model with vector store
Click the plus button under the Qdrant vector store labeled “Embedding.” We will be taken to the model management menu, where we will select embeddings Ollama and change the model to “nomic-embed-text:latest.”
4. Connecting the document loader with vector store
Click the plus button under the Qdrant vector store that says “Document,” and select “Default Data Loader” from the menu. Change the type of the data to “Binary”.
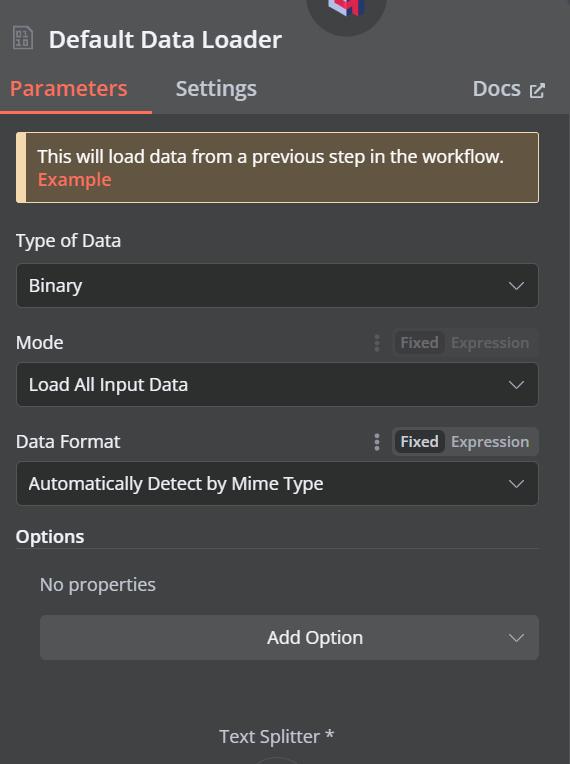
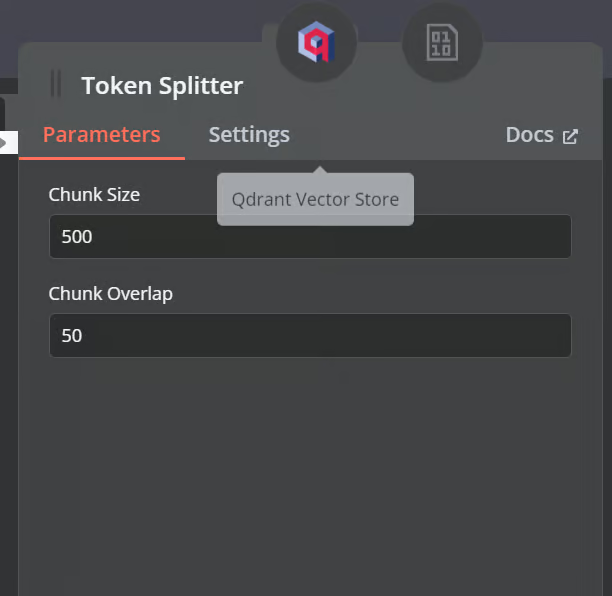
Then, add a token splitter with a chunk size of 500 and a chunk overlap of 50 will be added to the document loader.
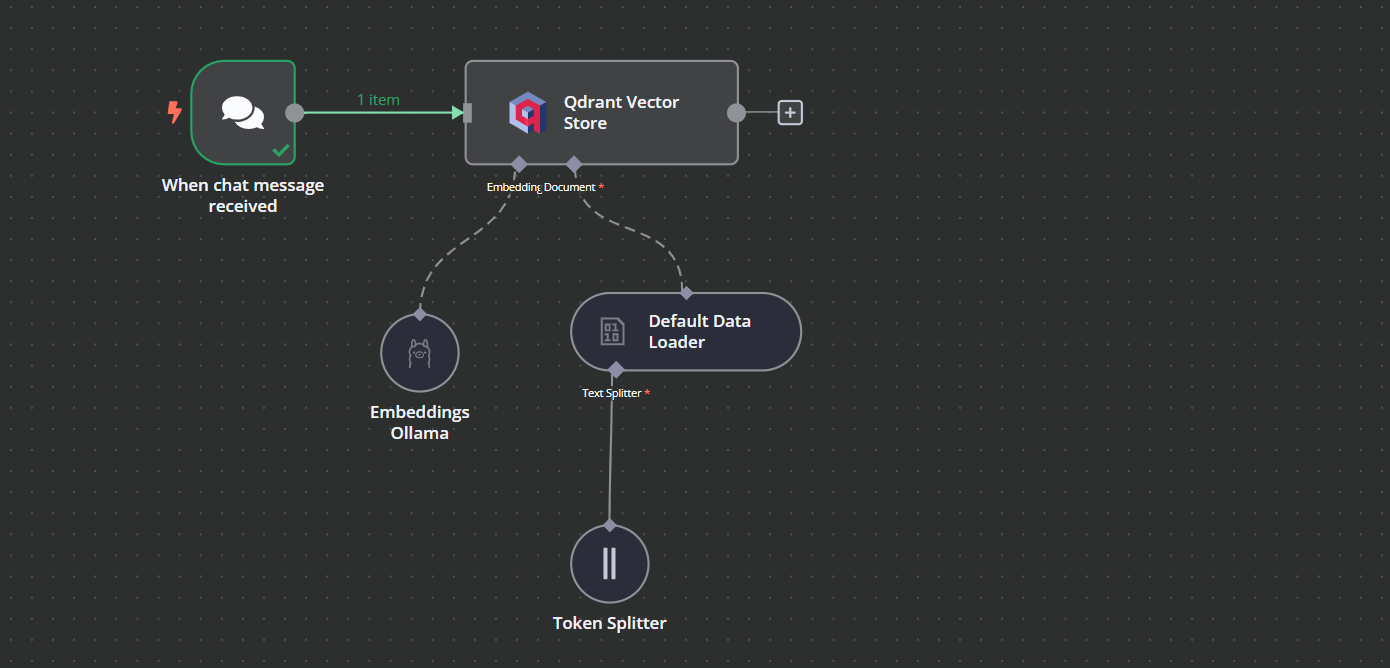
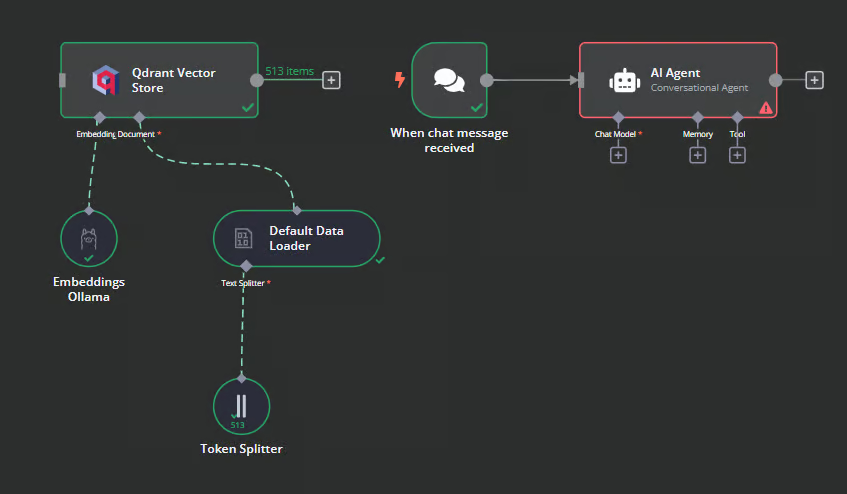
This is how our workflow should look in the end. This workflow will take the CSV files from the user, convert them into text, then transform the text into embeddings and store them in the vector store.
5. Testing the Qdrant vector store
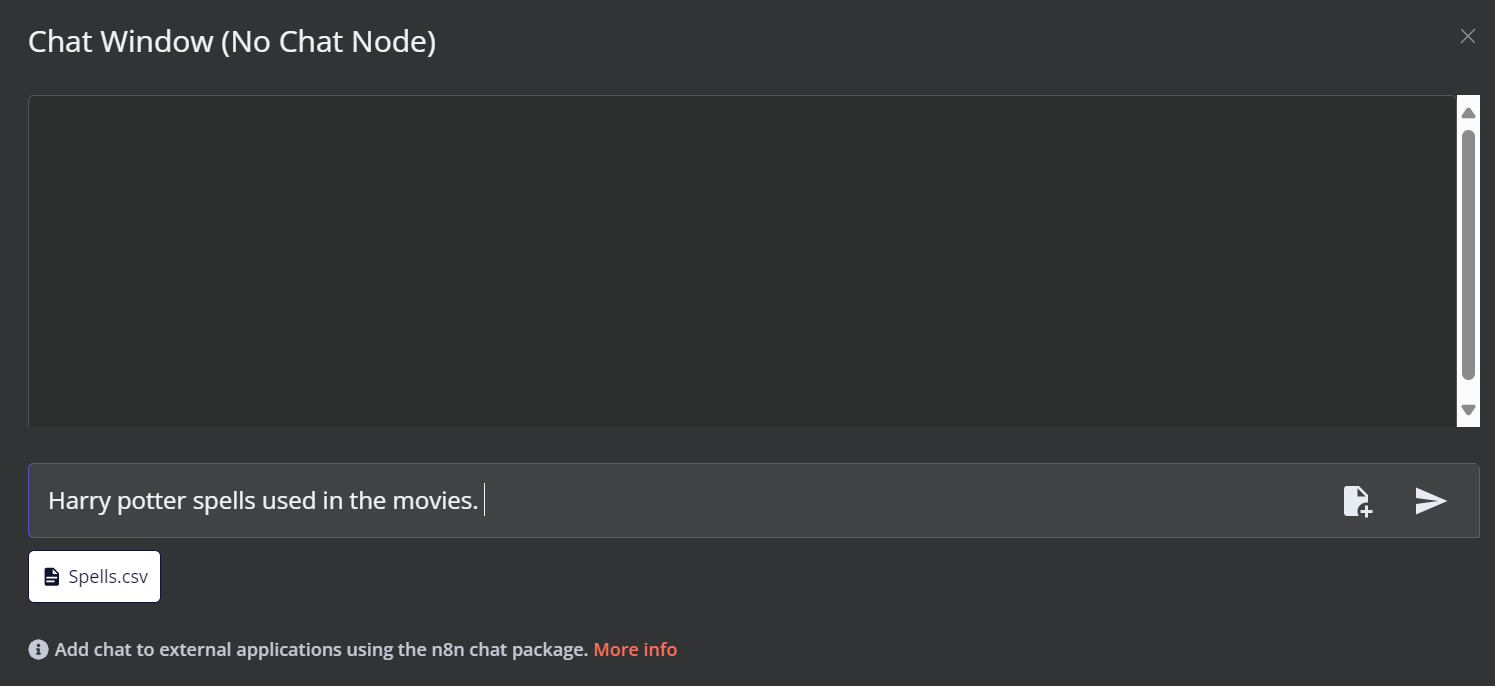
Click the Chat button at the bottom of the dashboard. Once the chat window opens, click on the file button as shown below.
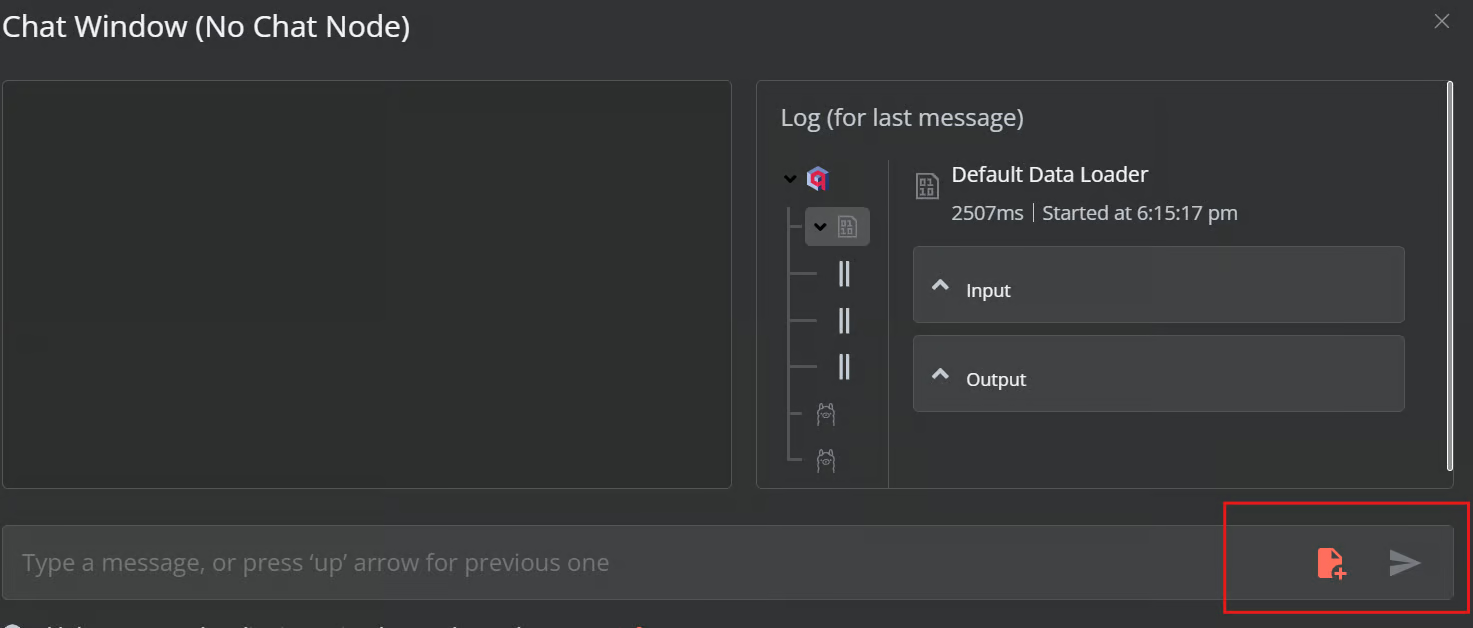
In this workflow, we will load all the CSV files from the Harry Potter Movies dataset. However, to test our workflow, we will only load a single CSV file called 'spell' based on a user query.
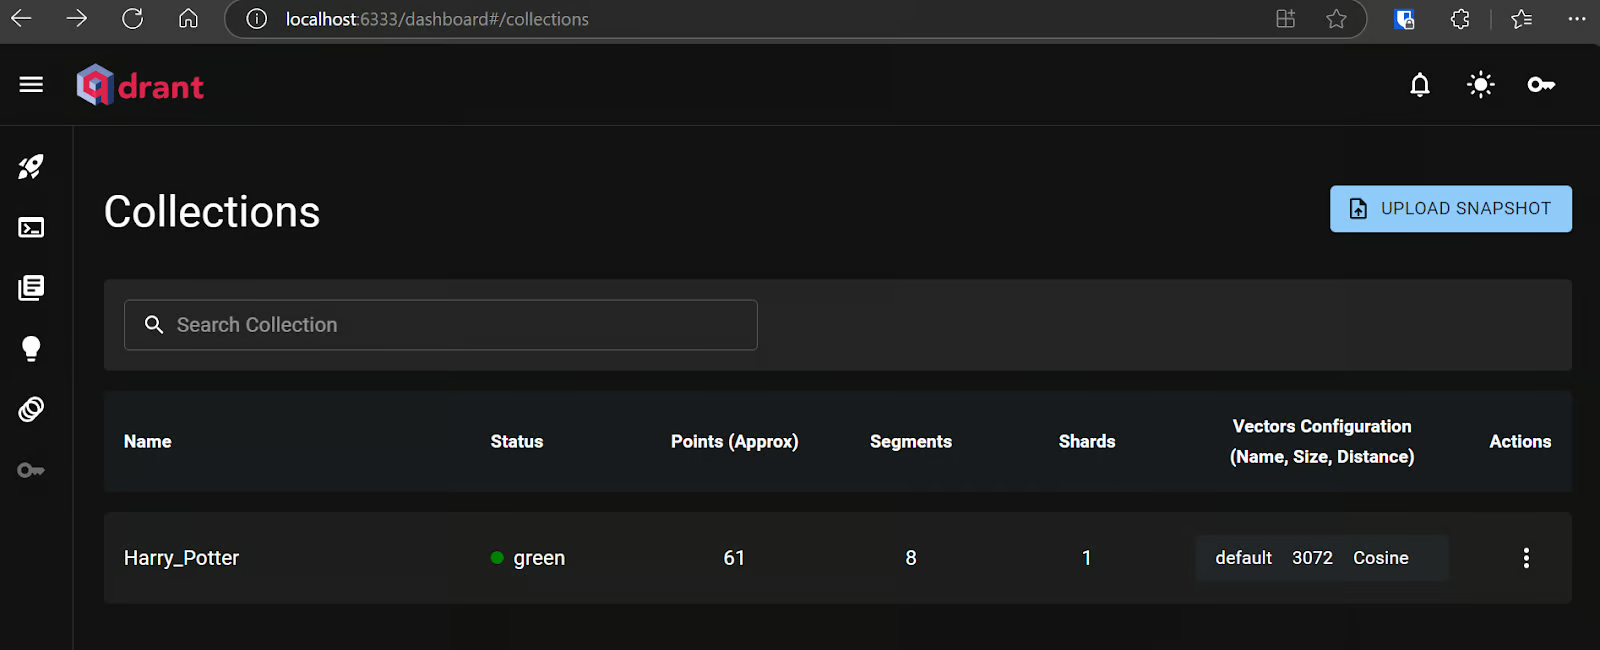
You can go to the Qdrant server using the URL http://localhost:6333/dashboard and check if the file was loaded to the vector store or note.
Now, add the rest of the files to the vector store.

6. Adding the AI agent
We will connect the chat trigger to the vector store, link it to the AI agent, and change the agent type to “Conversation Agent.”
7. Connecting the chat model with AI agent
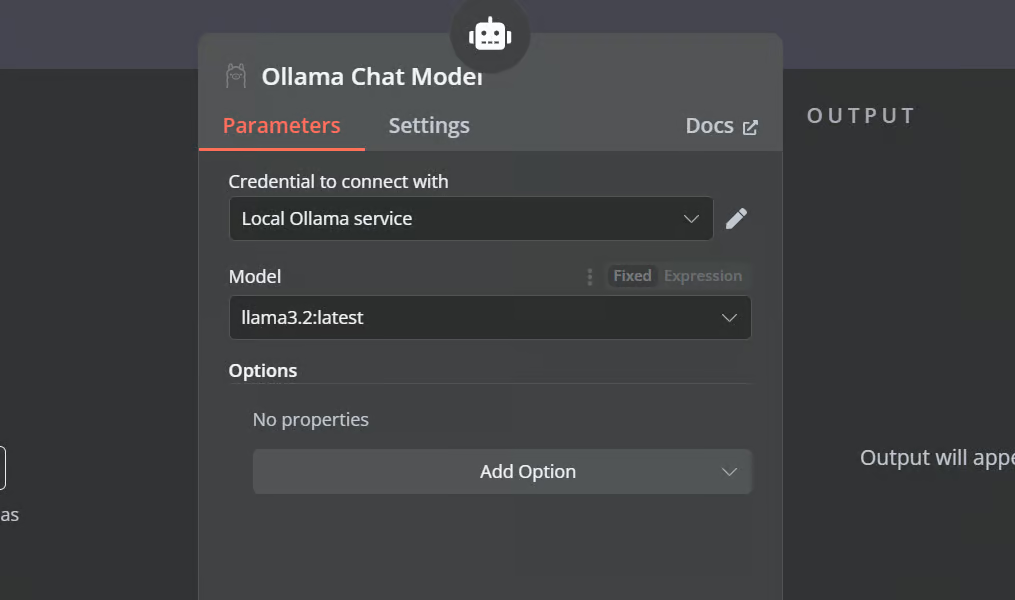
Click the “Chat Model” button under AI agent and select the Ollama Chat model from the menu. After that, chant the model name to “Llama3.2:latest”.
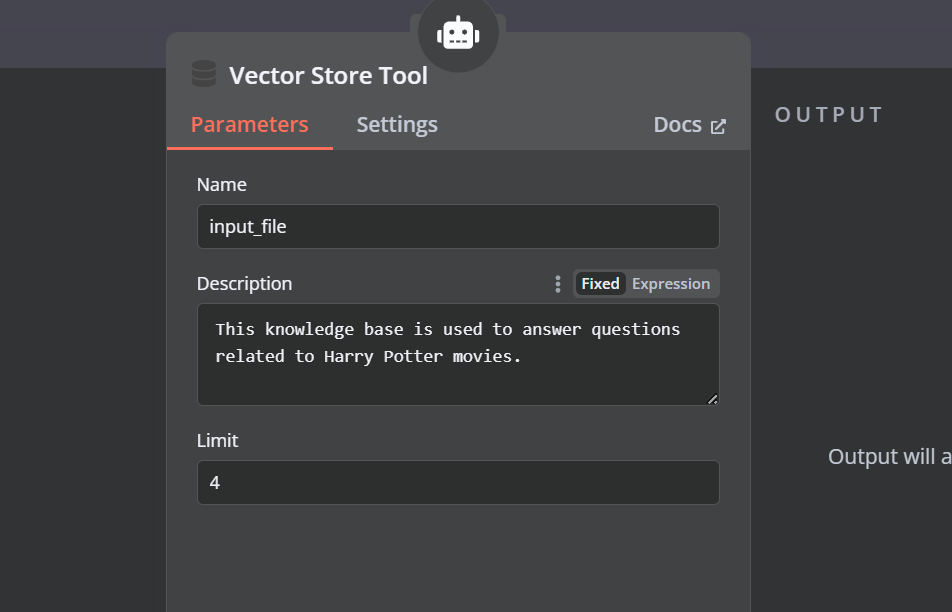
8. Connecting the vector store tool with AI agent
Click the “Tool” button under the AI agent and select the vector store tool from the menu. Provide the tool name and the description.
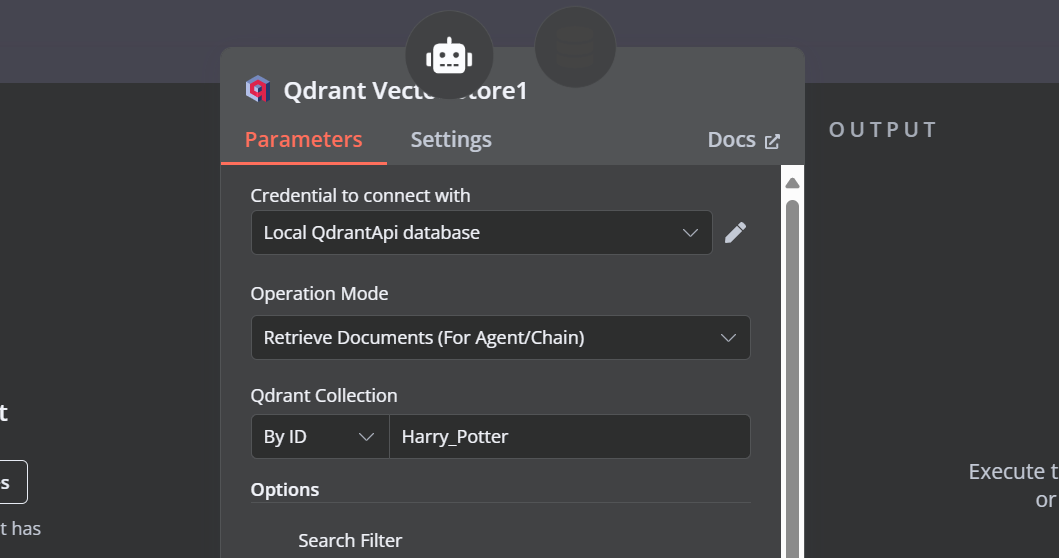
9. Connecting the Qdrant retriever with the vector store tool
We need to add components to the vector store tool. First, we will incorporate Qdrant as the vector store and set the collection ID to "Harry_Potter." This vector store will access the Harry Potter collection during the similarity search. Additionally, change the operation mode to "Retrieved Documents."
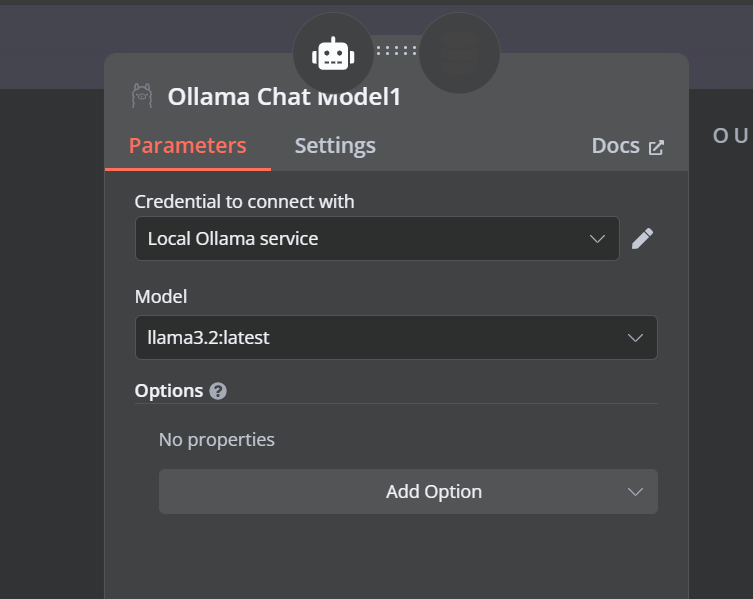
10. Connecting the chat model with the vector store tool
The vector store tool also requires an LLM model. We will connect the Ollama chat model and change the model to the “llama3.2:latest”.
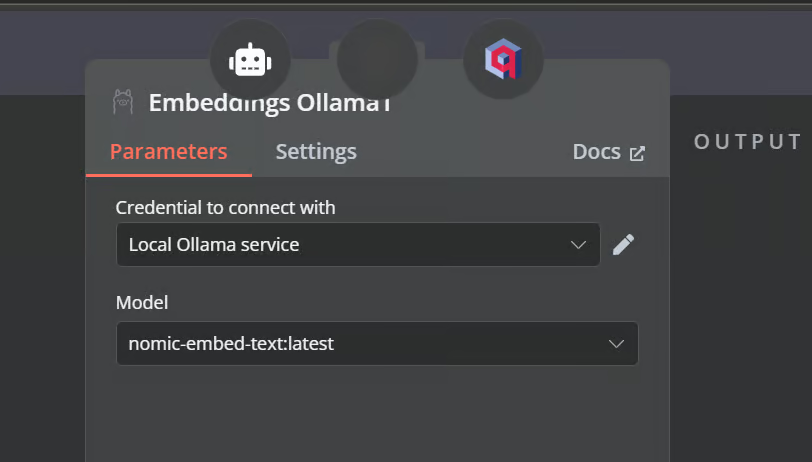
11. Connecting the embedding model with the Qdrant retriever
In the final step, we will supply the retrieval vector store with the embedding model. This allows it to convert the user query into an embedding and then convert the embedding back into text for the LLM to process.
Make sure you provide the correct embedding model for your vector store.
This is how the AI workflow should look like.
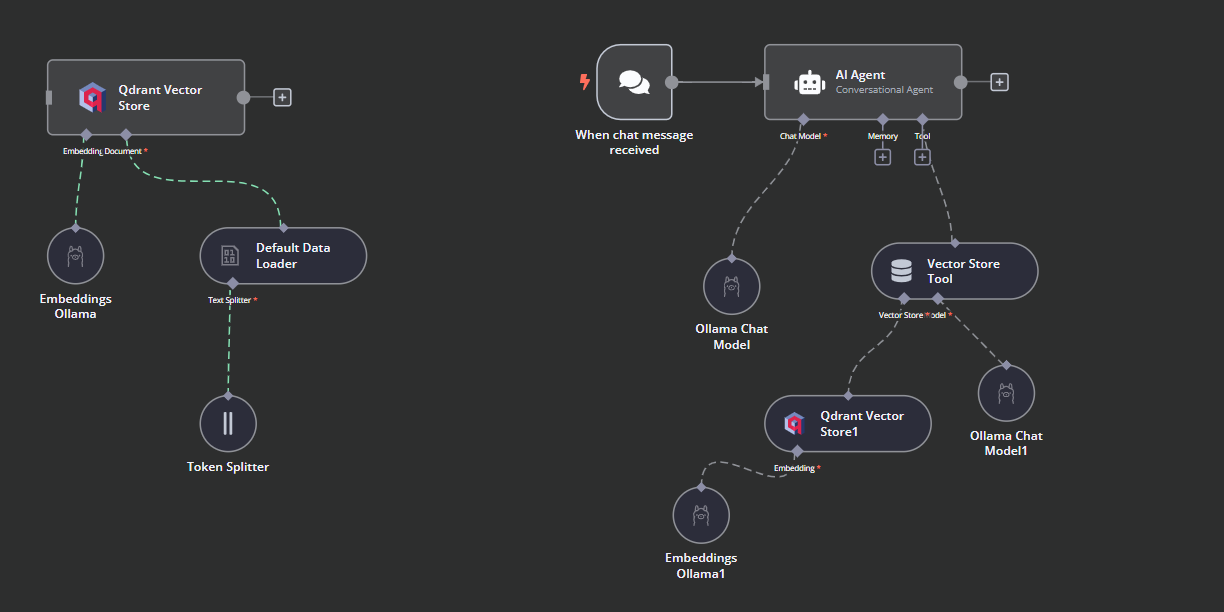
12. Testing the AI workflow
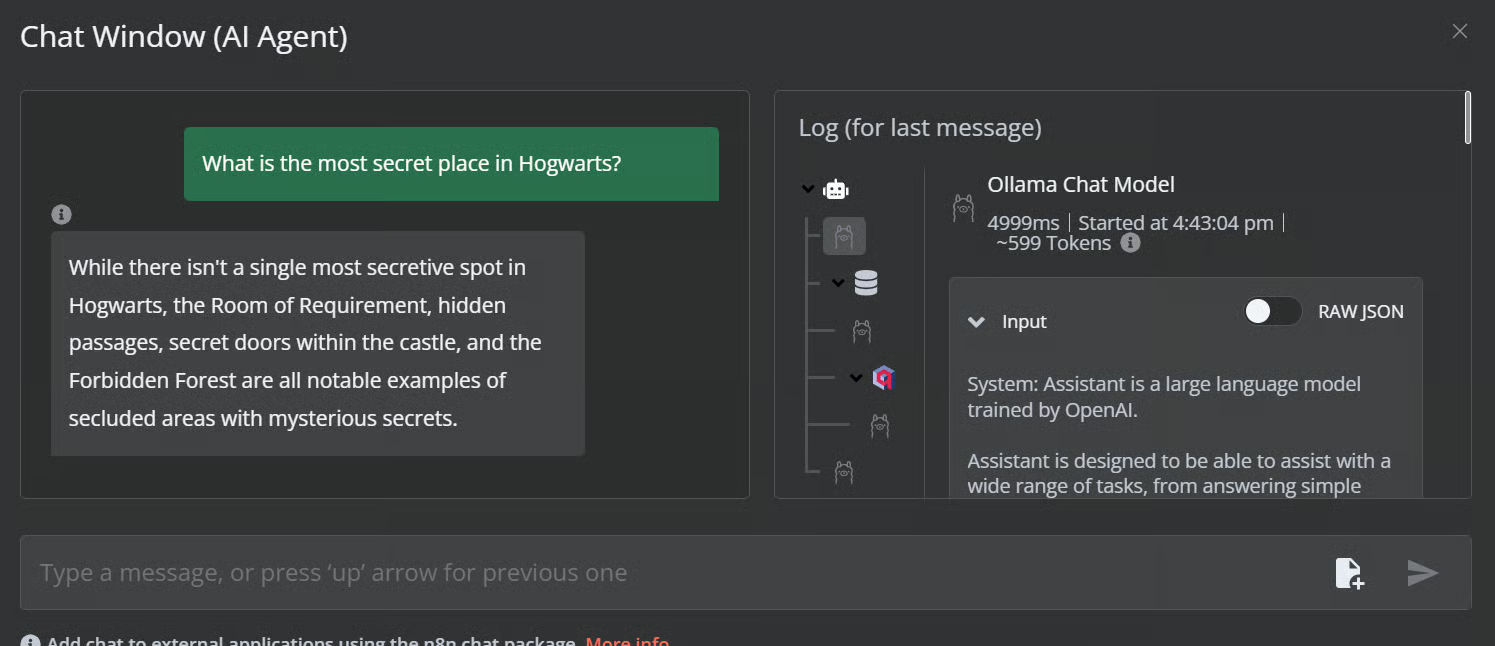
Click the chat button to start asking questions about the Harry Potter universe.
Prompt: “What is the most secret place in Hogwarts?”
Prompt: “What is the most powerful spell?”
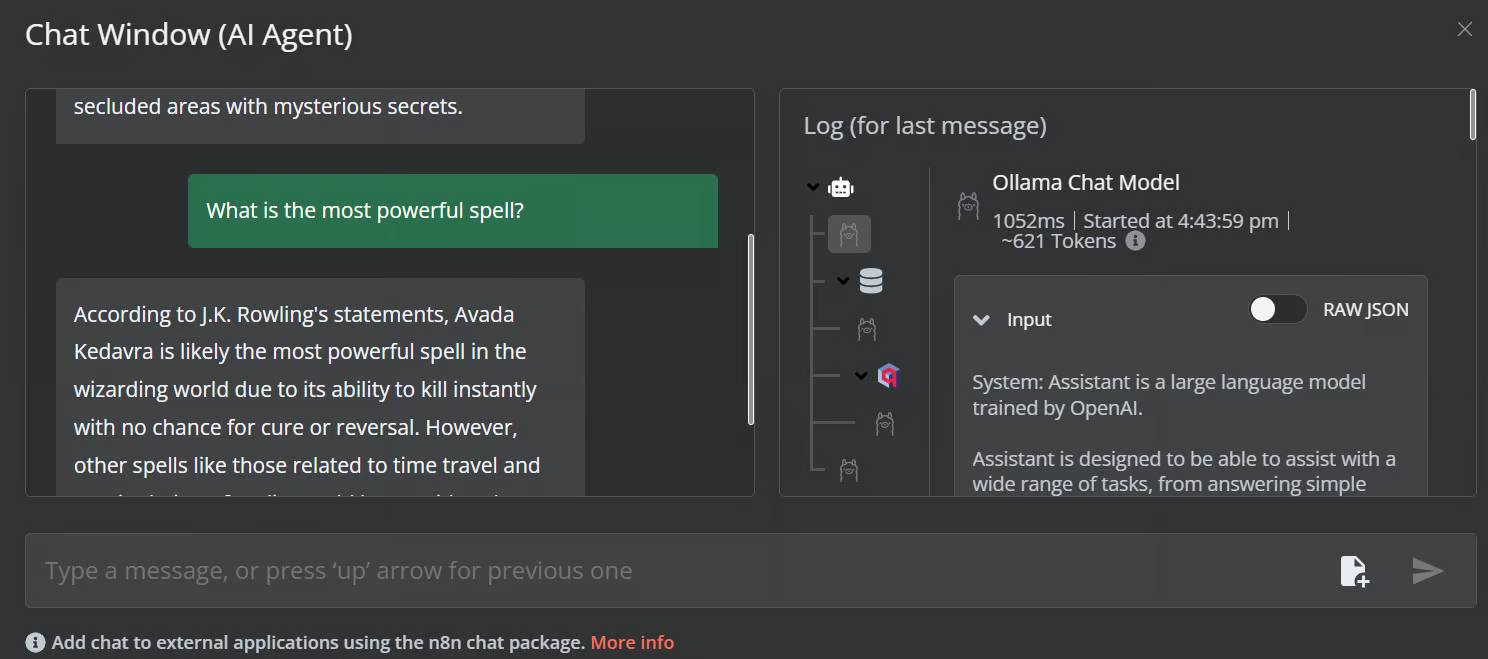
Our AI workflow is fast and functioning smoothly. This no-code approach is quite easy to execute. n8n also allows users to share their applications so that anyone can access them using a link, just like a ChatGPT.
Conclusion
n8n is a perfect tool for LLM/AI projects, especially for non-technical individuals. Sometimes, we don’t even have to create the workflow from scratch. All we need to do is search for similar projects on the n8n website, copy the JSON code, and paste it into our n8n dashboard. It’s that simple.
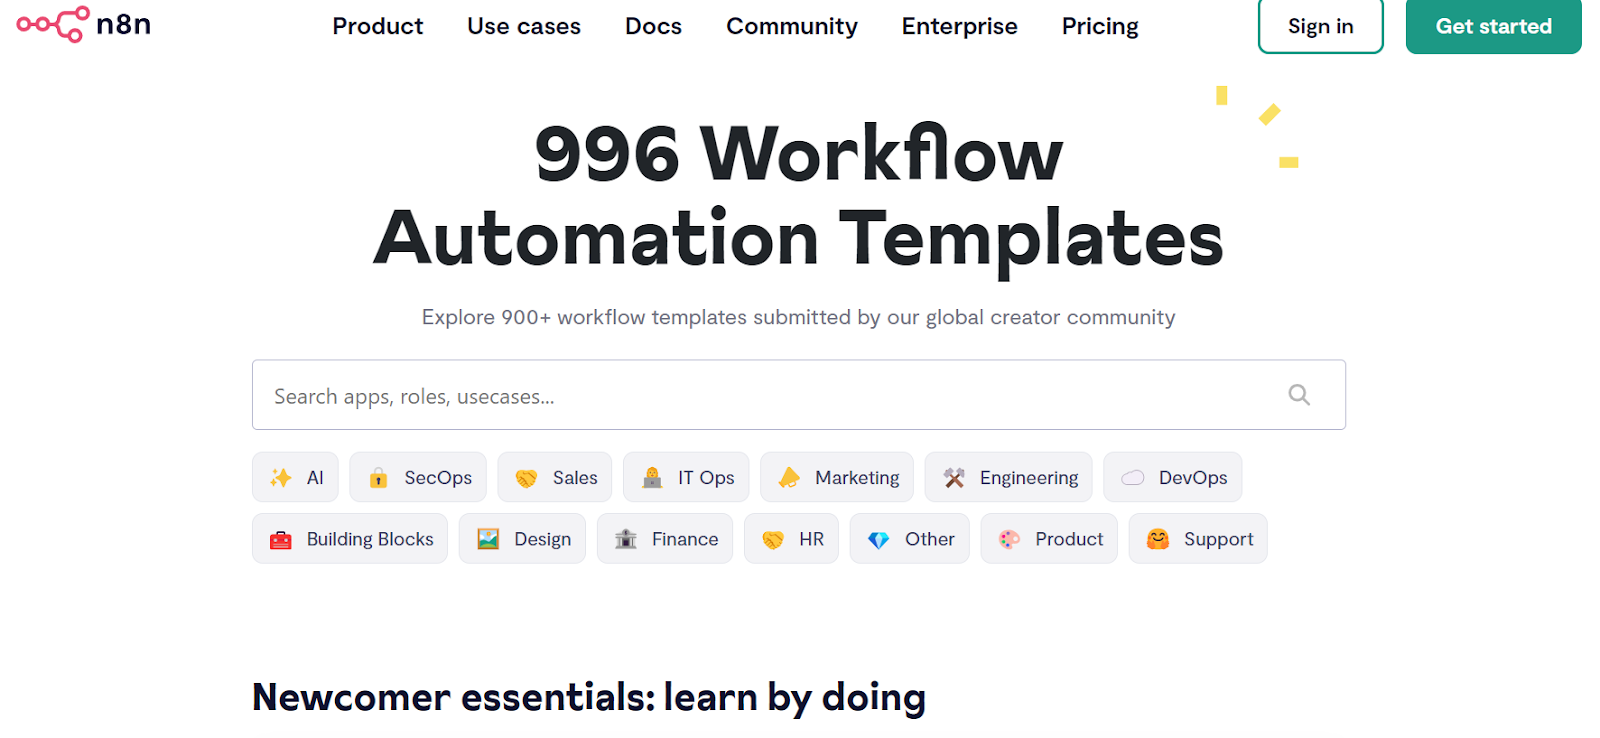
Source: Discover 900+ Automation Workflows from the n8n's Community
In this tutorial, we learned about local AI and how to use the self-hosted AI starter kit to build and deploy various AI services. We then launched the n8n dashboard and created our own AI workflow using Qdrant, embedding models, vector store tools, LLMs, and document loaders. Creating and executing workflows is quite easy with n8n. If you are new to AI tools and want to learn about no-code AI solutions, check out our other resources: